Monday, December 29, 2008

Building A Repertoire of Techniques

I always enjoy learning new techniques and I am always looking for something new to try. As I mentioned in the last two posts, I have now added printing on a gelatin plate to my repertoire. I first tried printing with a gelatin plate in October. I made a large plate and used it for several days. I thoroughly enjoyed the experience. I incorporated some of the fabric pieces I printed into two collages. The first one is complete and the second one has a few more embellishments to be added.


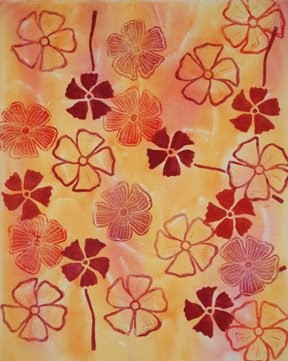
Another technique that I added to my repertoire several years ago is using an old credit card to scrap paint across fabric. I just put blobs of paint around the edges of the fabric and then start scraping the paint and mixing the colors. The results are always serendipitous. I usually finish by dropping blobs of gold metallic paint randomly over the fabric and using a multi-use spreader/scraper from the hardware store to create accents. The first example is on some polyester satin (one of my fabric fabrics to paint on) and the second one is on cotton with one of my desert spirit people silk screened over it.


Recently I visited Claire Benn and Leslie Morgan's web-site and in the pictures of Claire and Leslie was one of Leslie using a credit card to spread thicken dye on the top of fabric. I guess I will be trying that soon. I can hardly wait.
WHAT ARE YOUR FAVORITE TECHNIQUES?

Sunday, December 14, 2008

The Great Gelatin Print Experiment: Part 2

As stated earlier, art cloth #2 used 5 or 6 of the small gelatin plates.

Art Cloth #2, Steps 1-2
  • Rust gelatin prints
  • Rust squished brush strokes

Art Cloth #2, Step 3

  • Turquoise irregularly shaped prints using a weatherstrip stamp to minic shapes of some of the gelatin plates.

Art Cloth #2, Step 4

  • Applied light yellow-orange glaze

Art Cloth #2, Step 5

  • Metallic light turqoise stamped on with sponge

Art Cloth #2, Step 6

  • Mellic copper mixed with glass bead gel which was applied with a stencil brush using a freezer paper stencil of spirit people motifs

Art Cloth #2, Step 7

  • Metallic light turqoise stamped on with sponge over spirit people motifs


I am not that thrilled with this finished piece. I think it is the dark green rock shapes. Do you like it?

Also, I think Step 6 looks better in the photo than it did in person. The spirit people looked more prominent to me when the piece was on my design wall; however, maybe I should have lived with it a little before added the turquoise sponging over them. One thing I noticed as I took pictures of the steps is that the work almost always looked better in the photo than on the design wall. Any thoughts?

The Great Gelatin Print Experiment: Part 1

About a month ago, I made a plate of gelatin according to the directions in Rayna Gillman's book, Create Your Own Handprinted Cloth. Several of the pieces I printed have been used in fabric collages. Last week I decided I wanted to experiment with using gelatin prints in art cloth for my Creating your own Stamps and Stencils for Art Cloth class at AZ Art Supply in Tucson. (BTW ART CLOTH is cloth TRANSFORMED by adding or subtracting color, line, shape, texture, value, or fiber to CREATE a compelling surface.)


Therefore, I made another gelatin plate in a large foil cake pan, ran a knife along its edges, and turned it upside down, and pounded it to come out of the cake pan. WRONG!!!!! I was supposed to lift it out. Instead of one big sheet of gelatin, I had one medium piece and a lot of smaller, irregularly shaped ones. Thus, began the great gelatin experiment. I decided to square up the largest pieces so it resembled a rectangle. I did this with a paring knife that I keep in my studio. I used this gelatin plate and 5 or 6 of the other gelatin pieces for art cloth #1 and I only used the smaller gelatin plates for art cloth #2.

Art Cloth #1, Steps 1 - 3
  • Turquoise gelatin prints
  • Smaller rust gelatin prints
  • Rust prints using eraser stamps
Art Cloth #1, Steps 4-5
  • Blue-violet and violet monoprints using large gelatin plate
  • Blue-violet and blue spiral prints using eraser stamps

Art Cloth #1, Step 6

  • Applied light mauve glaze
Art Cloth #1, Step 7
  • Metallic copper spiral prints using weatherstrip stamp

Friday, December 12, 2008

Finishing Sun Prints

Below are the results from adding some layers to the sun prints I did earlier. I use some of the new stamps and stencils I cut and real geraniums leaves. The lines on the green piece were created using needletip applicators.


Tuesday, December 9, 2008

Getting Back On Track

I got side-tracked from blogging because of working on class samples. In November, I went to a new art store in Tucson and on their door was a sign that they were looking for art instructors. After meeting with their representative, I am now scheduled to teach two classes at the Arizona Art Supply store in Tucson. The first is Introduction to Art Cloth and the second is Creating Your Own Stamps and Stencils for Art Cloth. I created some new butterfly images to make some stamps and stencils. I had not made any stamps or stencils in a long time. I had forgotten how time consuming this tasks are. A week later I was finally done. I think I need to make stamps and stencils on a more regular basis to keep those skills honed.

Last week, I started working on some samples. The first set of samples were sun printed.


I put all kinds of pods that I had collected this year to sun print on this sample.


This one I scrunched up and left it for 5 minutes. Then I unwrapped it and let it dry.

I sun printed this fabric with a rubber carpet grid which had been stored folded up. As a result not all of it laid flat on the fabric producing faded areas of the grid on the fabric. I liked this serendipitous result.